Free Gaussian Splatting Software: Setting Up, Building, and Using LichtFeld Studio
LichtFeld Studio is said to produce Gaussian Splatting results comparable to paid Postshot. This article covers setup and the steps for creating a Gaussian scene from 219 photos.
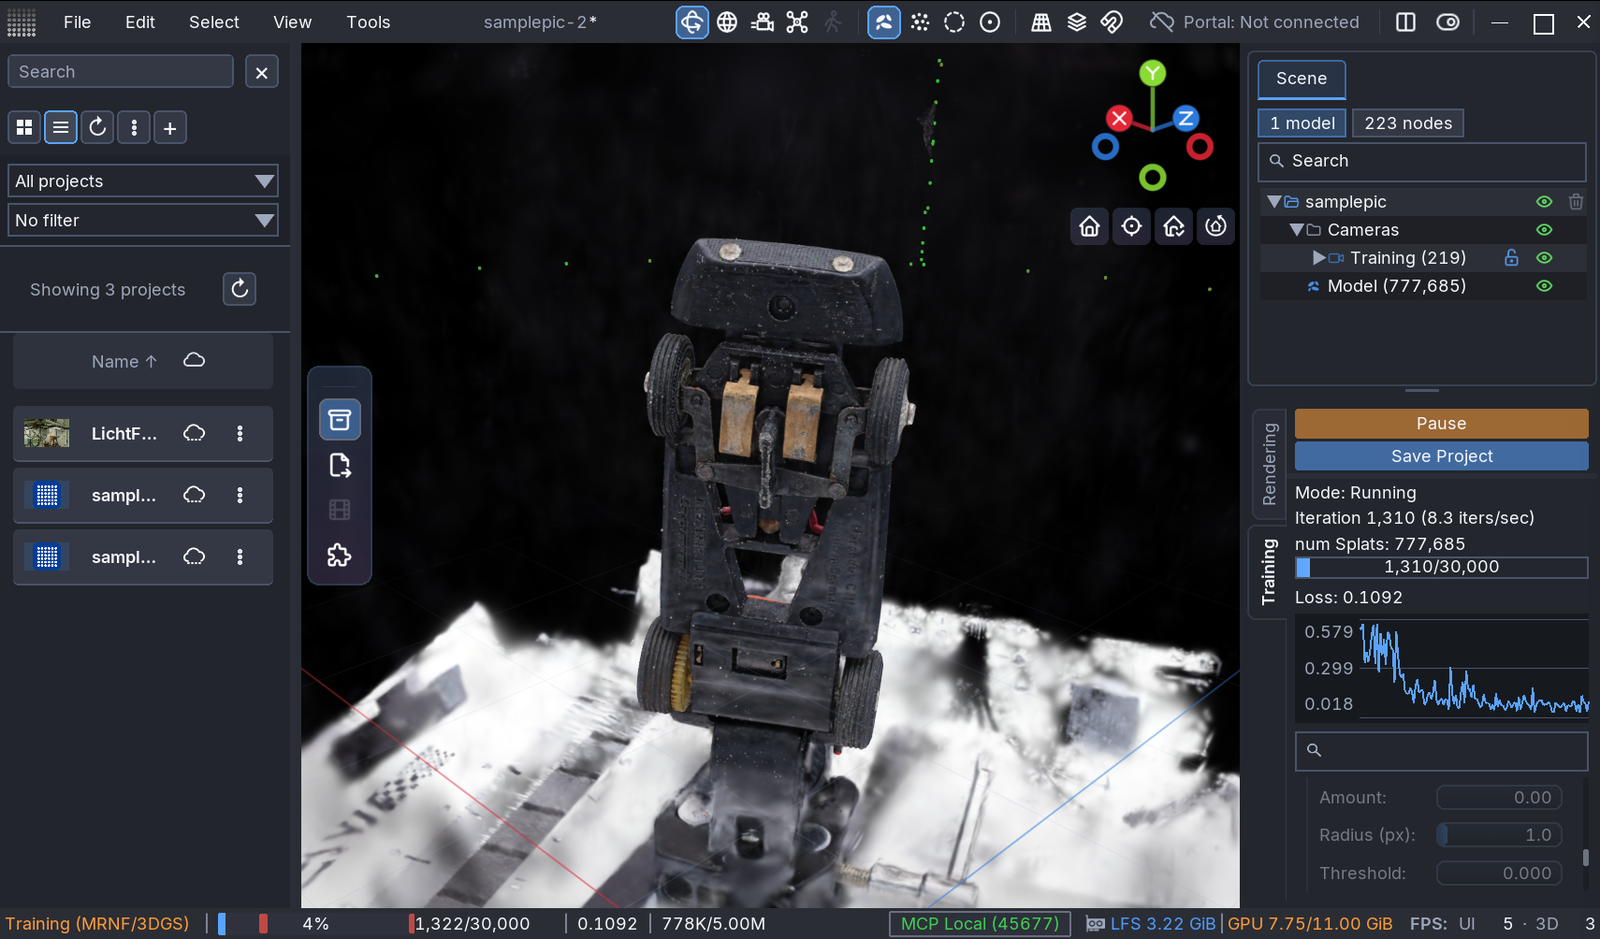
Gaussian Splatting is a 3D technique that turns photos into a scene you can view from different angles. It represents the scene using many small ellipsoids with color and opacity. The full name is 3D Gaussian Splatting, often shortened to 3DGS. Postshot is one of the main applications in this field. LichtFeld Studio is another 3DGS application.
LichtFeld Studio official website: features and product demohttps://lichtfeld.io/
The quickest way to understand what 3DGS looks like is to try the official showcase below. Drag with the left mouse button to orbit the scene, and use the scroll wheel to zoom in and out.
LichtFeld Studio official showcase: explore Gaussian sceneshttps://lichtfeld.io/showcase/
Postshot's monthly price makes free alternatives appealing
Postshot is one of the established 3DGS applications. Information on using it is easy to find, and there is reassurance in choosing an established tool. However, following its free beta period, its paid plans now use subscriptions. As of November 8, 2026, monthly billing costs EUR 26 per month for Indie and EUR 59 per month for Studio. These prices exclude tax; annual billing has different rates.
A noncommercial Free plan is also available, but commercial use and exporting Gaussian scenes as PLY or SPZ require Indie or higher. The full-featured Studio plan was listed at roughly JPY 10,000 per month when I checked the yen pricing. That is not cheap.
Postshot official pricing: Free, Indie, and Studio plans and featureshttps://www.jawset.com/shop/
Recently, I have been hearing that LichtFeld Studio is both free and capable. Some users who have tried both applications say that LichtFeld Studio looked better on some of their datasets. If a free application produces results that look good enough, it is only natural to want to use it.
With that in mind, I will walk through creating a Gaussian scene from 219 photos using LichtFeld Studio built from source on Windows. I will also explain the RealityScan workflow. Postshot can similarly reuse reconstruction data from RealityScan, so let's try working that way here too.
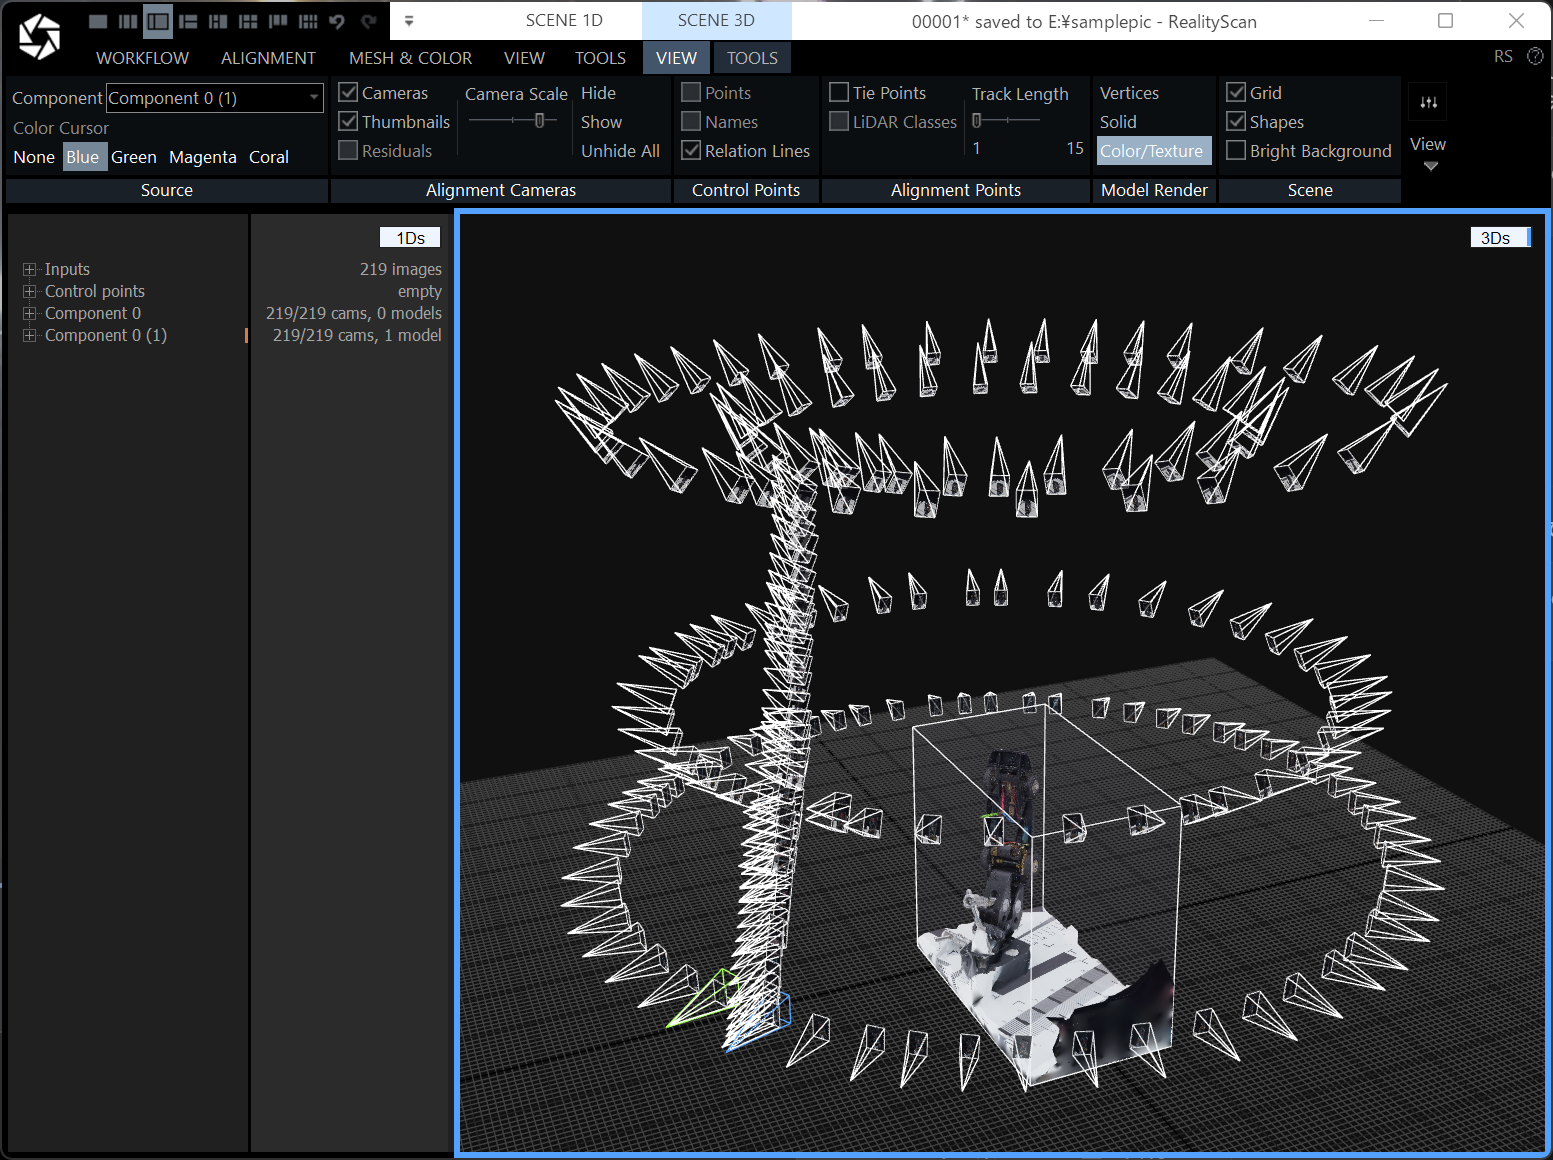
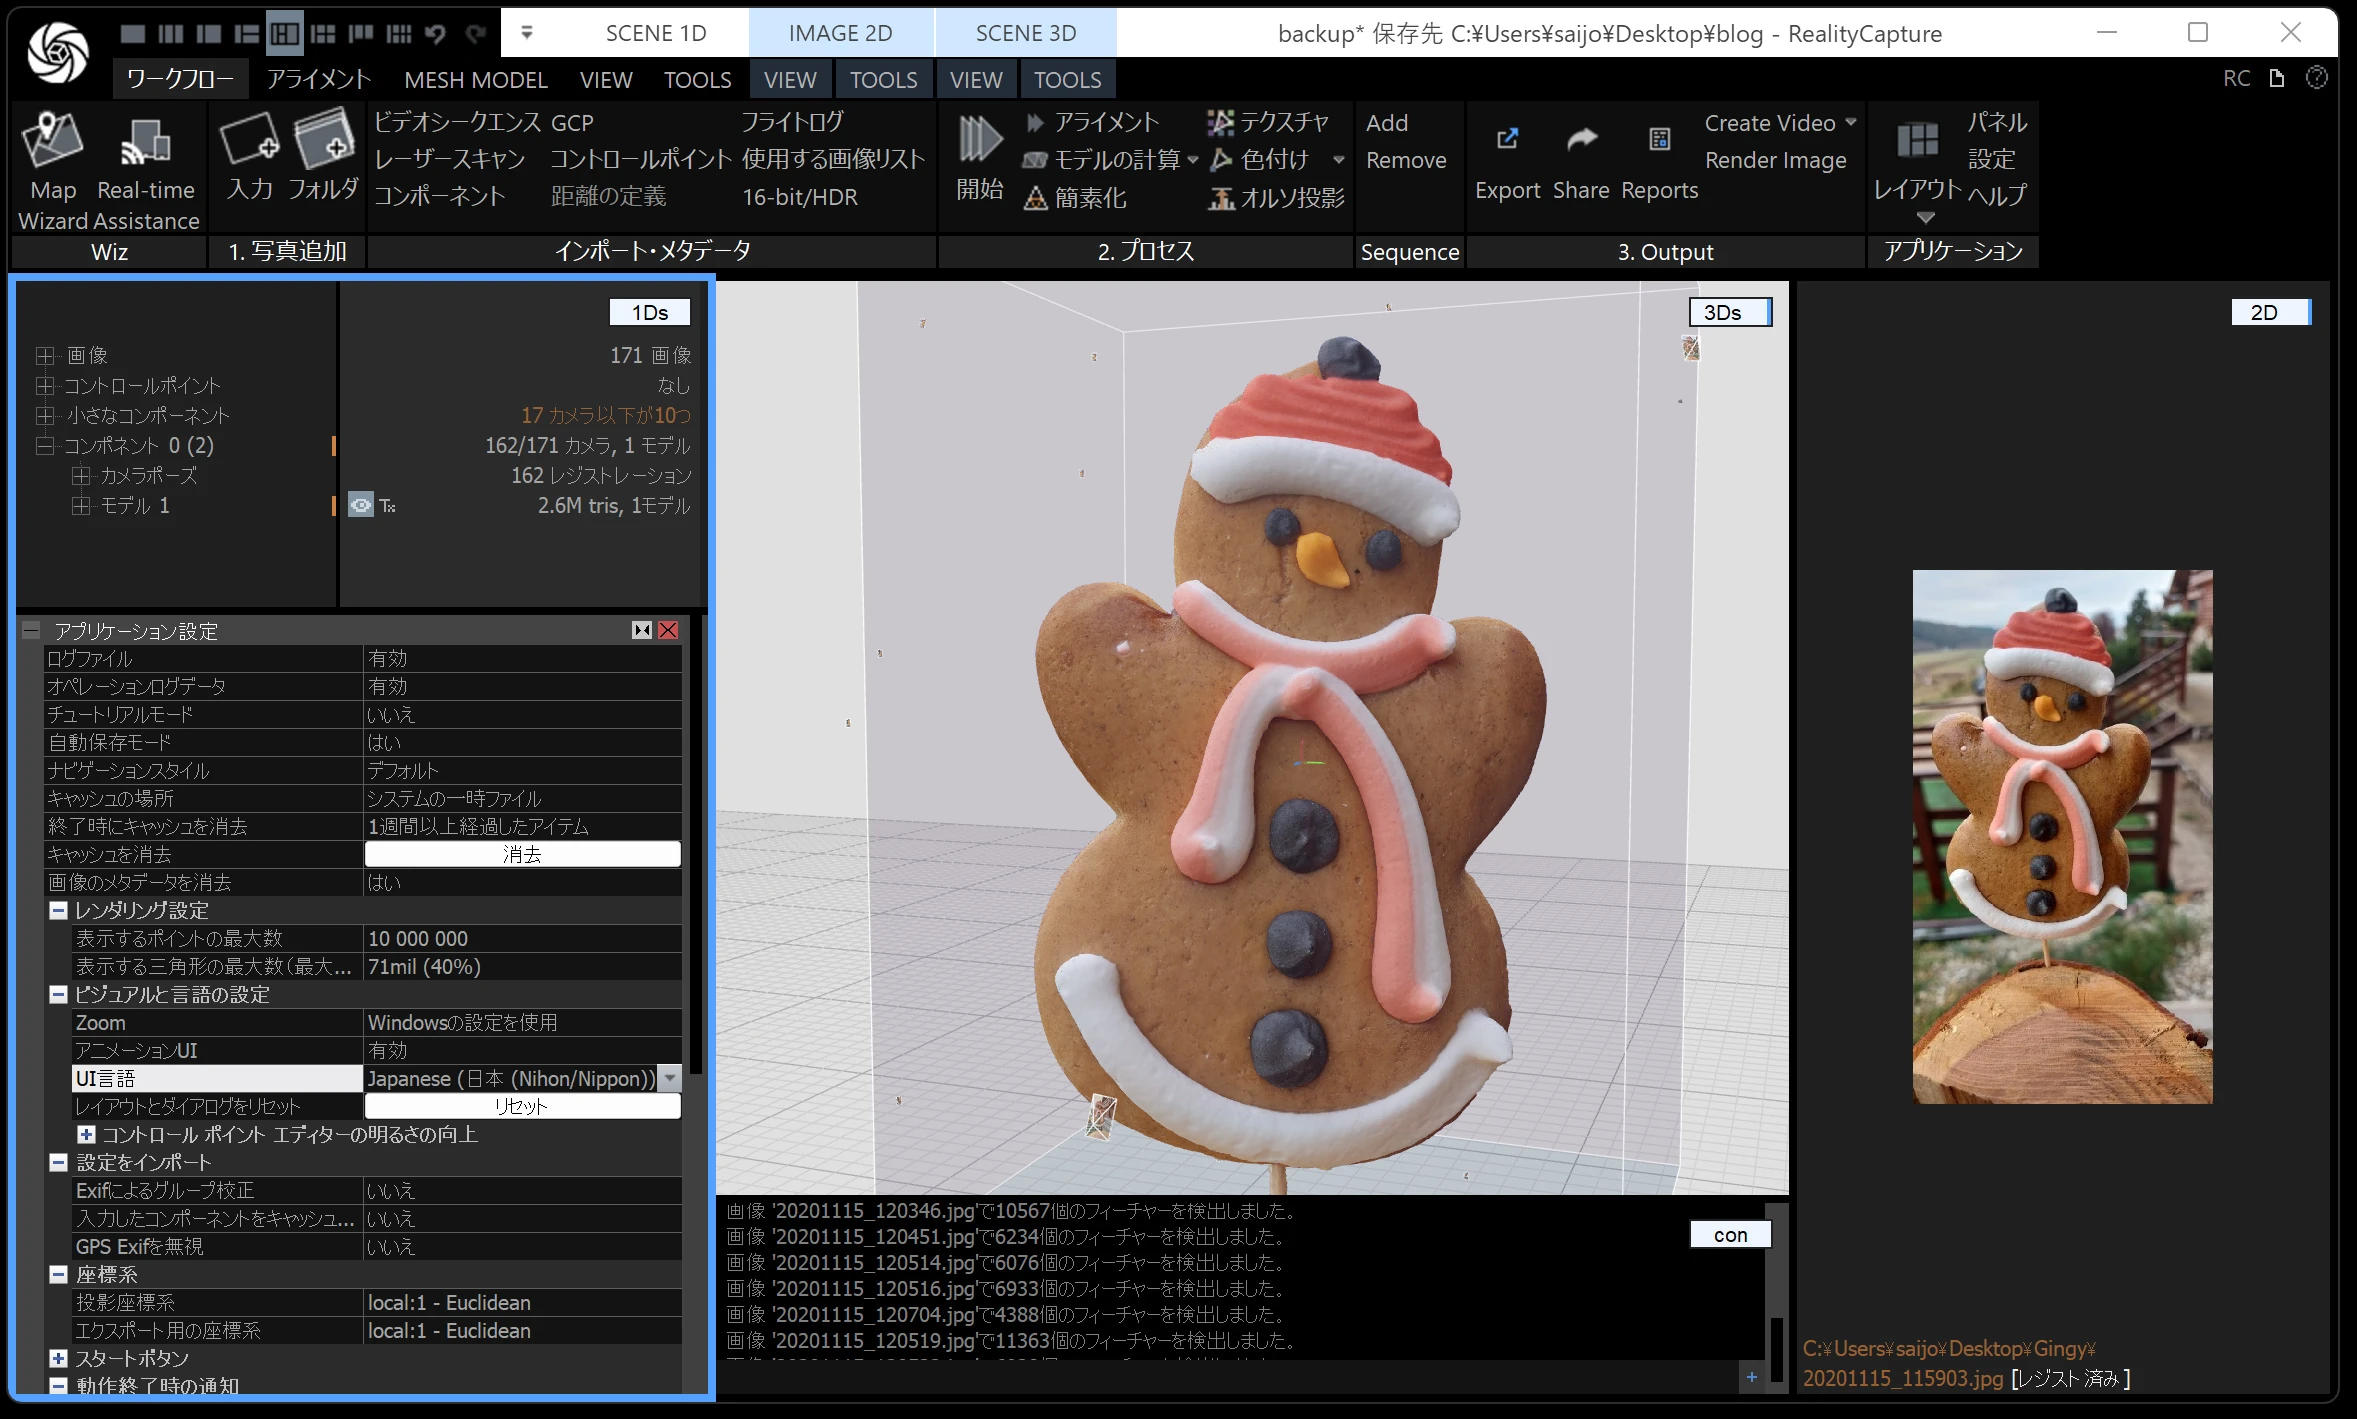
RealityScan creates 3D models from multiple photos. Here I use the desktop version to align the photos and prepare camera positions and orientations, along with a point cloud that represents the shape as a collection of points. The following article explains the basic workflow.
RealityScan official website: creating 3D models from photoshttps://www.realityscan.com/
Free for commercial use when built from source; official builds start at USD 30
LichtFeld Studio's core is released under the GPLv3-or-later open-source license. Put simply, the GPL grants the freedom to use, modify, and redistribute the software. Commercial use and selling copies of the software are both allowed.
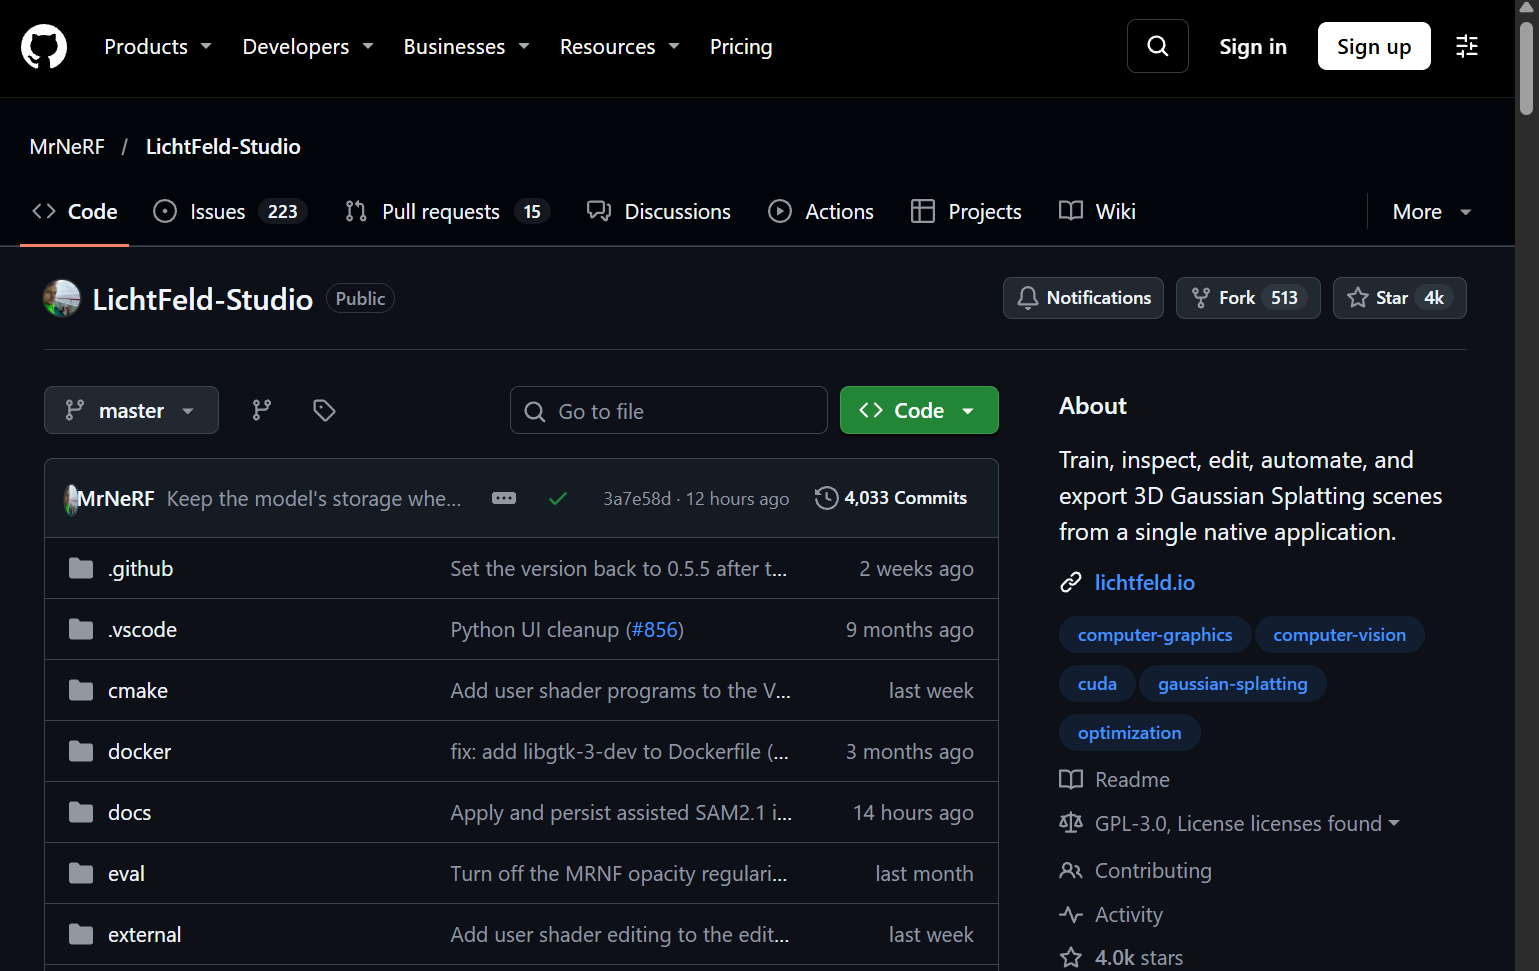
If you distribute the software or a modified version, conditions apply, including making the corresponding source available to recipients. Using it yourself does not require publishing source code, and ordinary Gaussian data you create does not automatically become GPL-licensed.
Building it yourself from source, as I did here, costs nothing for the software. The core also includes an additional permission for combining it with certain NVIDIA libraries.
There is also an option to obtain Windows executables prepared by the developers. As of November 8, 2026, the official portal's Standard tier costs USD 30. That is a few thousand yen, with the actual yen amount and tax depending on checkout conditions. Supporter starts at USD 50, and Sponsor at USD 500. Official builds require an NVIDIA RTX 20-series GPU or newer and driver version 570 or newer.
Every tier includes access to official builds, feature suggestions and roadmap voting, and priority handling of bug reports. Higher tiers provide more votes and a way to contribute more toward development. Custom development and guaranteed support response times are not included. The software remains GPL-licensed when you obtain a paid build.
Official portal: Windows build pricing and registrationhttps://portal.lichtfeld.io/signup/
Official portal terms: binary delivery and licensinghttps://portal.lichtfeld.io/terms/
You can therefore prepare the environment yourself and use the software for free, or choose an official build from USD 30 to save the work of compiling it.
Building the Windows version on a PC with an RTX 2080 Ti
The PC has a Core i9-9900K, 64GB of memory, and a GeForce RTX 2080 Ti. It is not a new GPU, but I was able to build the application and run training on this system.
| Item | My configuration |
|---|---|
| OS | Windows 11 Pro |
| CPU | Core i9-9900K, 8 cores and 16 threads |
| Memory | 64GB |
| GPU | GeForce RTX 2080 Ti, 11GB VRAM |
| NVIDIA driver | 617.42 |
| C++ development tools | Visual Studio Build Tools 2022 17.14.41 |
| CUDA Toolkit | 12.8.1 |
| CMake / Ninja | 3.31.6 / 1.12.1 |
| LLVM / Clang | 20.1.8 |
I built v0.5.5-dev-141-g23fb4b466, a development version of 0.5.5, using source obtained on November 3, 2026.
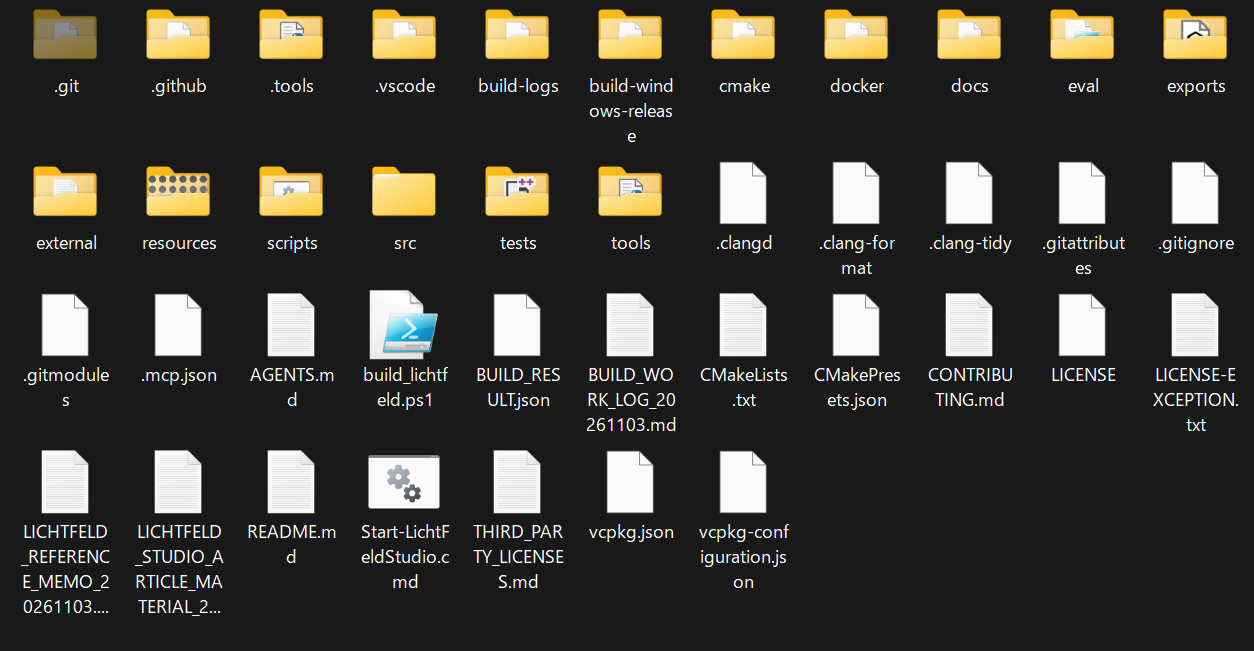
Building means turning the published source code into an executable that runs on your PC. Broadly, the process is to prepare the development tools, obtain the source and required libraries, and build through CMake.
This version requires the Visual Studio 2022 17.10-or-later C++ development environment, CUDA Toolkit 12.8 or later, CMake 3.30 or later, Ninja, Git, and vcpkg. vcpkg supplies the external libraries the application uses. The clang-cl compiler is also needed to build the libplacebo dependency.
In Visual Studio Installer, check Desktop development with C++, the Windows SDK, the CMake tools, and C++ Clang Compiler for Windows. The following is an outline for an x64 Developer PowerShell where those tools and CUDA are available.
First, obtain the source along with its required components. The git checkout command selects the version I used.
X:\XXXXXXXX\LichtFeldStudiois a placeholder path. ChangeX:andXXXXXXXXin$lfsProjectDirbelow to your own drive and folder before running the commands. Read the other example paths in this article the same way.
$lfsProjectDir = 'X:\XXXXXXXX\LichtFeldStudio'  # Change this to your own destination
git clone --recursive https://github.com/MrNeRF/LichtFeld-Studio.git "$lfsProjectDir"
Set-Location -LiteralPath $lfsProjectDir
git checkout 23fb4b466868b875491af63f6e973eab3ebdfc6b
git submodule update --init --recursive
Next, prepare vcpkg inside the working folder. These commands select the version used for this build.
New-Item -ItemType Directory -Force .tools | Out-Null
git clone https://github.com/microsoft/vcpkg.git .tools\vcpkg
git -C .tools\vcpkg checkout c653b77e80d1b61e5f5bd2eabf15bc6ec3bfe7ad
.\.tools\vcpkg\bootstrap-vcpkg.bat -disableMetrics
$env:VCPKG_ROOT = (Resolve-Path .tools\vcpkg).Path
$env:VCPKG_MAX_CONCURRENCY = "6"
Once ready, configure and build using the official windows-release preset. vcpkg also obtains and builds libraries during configuration.
cmake --preset windows-release -DCMAKE_C_COMPILER=cl.exe -DCMAKE_CXX_COMPILER=cl.exe -DBUILD_PYTHON_STUBS=OFF
cmake --build --preset windows-release --parallel 6
--parallel 6 allows up to six parallel build jobs. BUILD_PYTHON_STUBS=OFF skips generating Python type-information files; it does not disable the application's Python functionality.
The PC already had a C++ development environment, but I could not find CUDA Toolkit or clang-cl. I extracted NVIDIA's official CUDA redistribution archives and LLVM into .tools, then used a helper script to set environment variables. That helper was created for this setup and is not supplied in the official repository.
This avoided reinstalling CUDA and LLVM system-wide. I did not update the driver or restart Windows. I left the build and initial launch to Codex, then imported the data and started training myself while consulting it.
This is a record of the work performed on November 3, 2026. Required tools and procedures change, so check the current README and build instructions on GitHub's master branch when installing the application. If you ask Codex or another LLM to do the work, have it refer to the latest official instructions too.
Under two hours to launch; dependencies take time on the first build
Including environment preparation and troubleshooting, it took just under two hours to launch the application. Building the 80 dependency packages took about 50 minutes, and the application itself took about 45 minutes. CMake's configuration stage was building the required libraries as well as checking settings.
The application build failed once. The CUDA components I initially extracted were missing cuda_profiler_api.h, which stopped compilation. I added the official cuda_profiler_api component and the also-missing cuda_nvml_dev, then resumed. No application source changes were needed.
Compiling the C++ file py_ui.cpp also took a while: over ten minutes for this file alone. The log stayed still for a time, but the compiler's CPU time kept increasing. I waited, and the build eventually finished.
The executable appeared in build-windows-release inside the chosen working folder. The main files were arranged as follows.
X:\XXXXXXXX\LichtFeldStudio\
  .tools\                         CUDA, LLVM, vcpkg, and other tools
  build-windows-release\
    LichtFeld-Studio.exe           The built application
    nvjpeg64_12.dll                Runtime library added for this setup
  build-logs\                     Build logs
  Start-LichtFeldStudio.cmd        Launcher created for this setup
With the locally extracted CUDA setup, I also placed the nvJPEG runtime nvjpeg64_12.dll next to the executable. A DLL is a library loaded by an application at runtime. After confirming that --help and --version exited normally, I launched the application.
The interface has a central 3D view, data and models in Scene, and settings and progress in Training. From this point onward, you work in a desktop application with a visual interface.
Considering that it took nearly two hours to reach this point, USD 30 for an official build actually feels inexpensive. Some of that was waiting, but checking the environment and resolving missing components took effort too. You can spend your own time preparing it or pay to skip that preparation. Building it yourself is an interesting experience, but an official build also seems reasonably priced for someone who wants to get on with making Gaussian scenes.
Creating a Gaussian scene from 219 photos
I used 219 JPEG photos. RealityScan 2.2 aligns the photos, then passes the camera positions and orientations and a sparse point cloud representing the rough shape to LichtFeld Studio. It sounds complicated, but it is simple: just a few clicks.
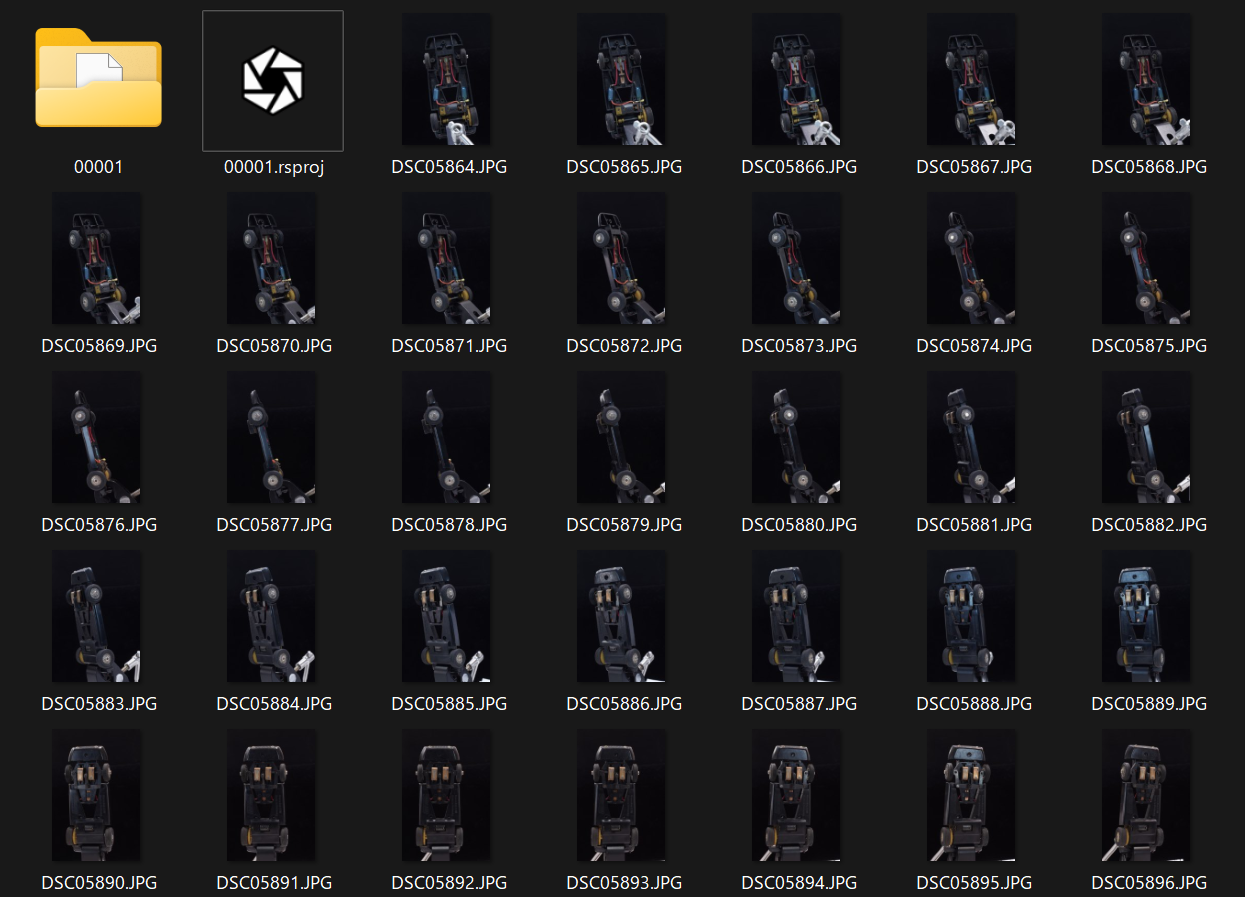
The transfer uses COLMAP format, which was recently added to RealityScan. It stores camera information, individual photo poses, and the point cloud together, and the matching photos are used for training.
1. Align the photos in RealityScan
I will skip the full RealityScan walkthrough here. Analyze the photos in ALIGNMENT. All 219 photos aligned, so that part was done. RealityScan has a reputation for being fast at this work.
2. Export camera information and photos in COLMAP format
In RealityScan, select the aligned component and choose COLMAP under ALIGNMENT > Export > Registration.
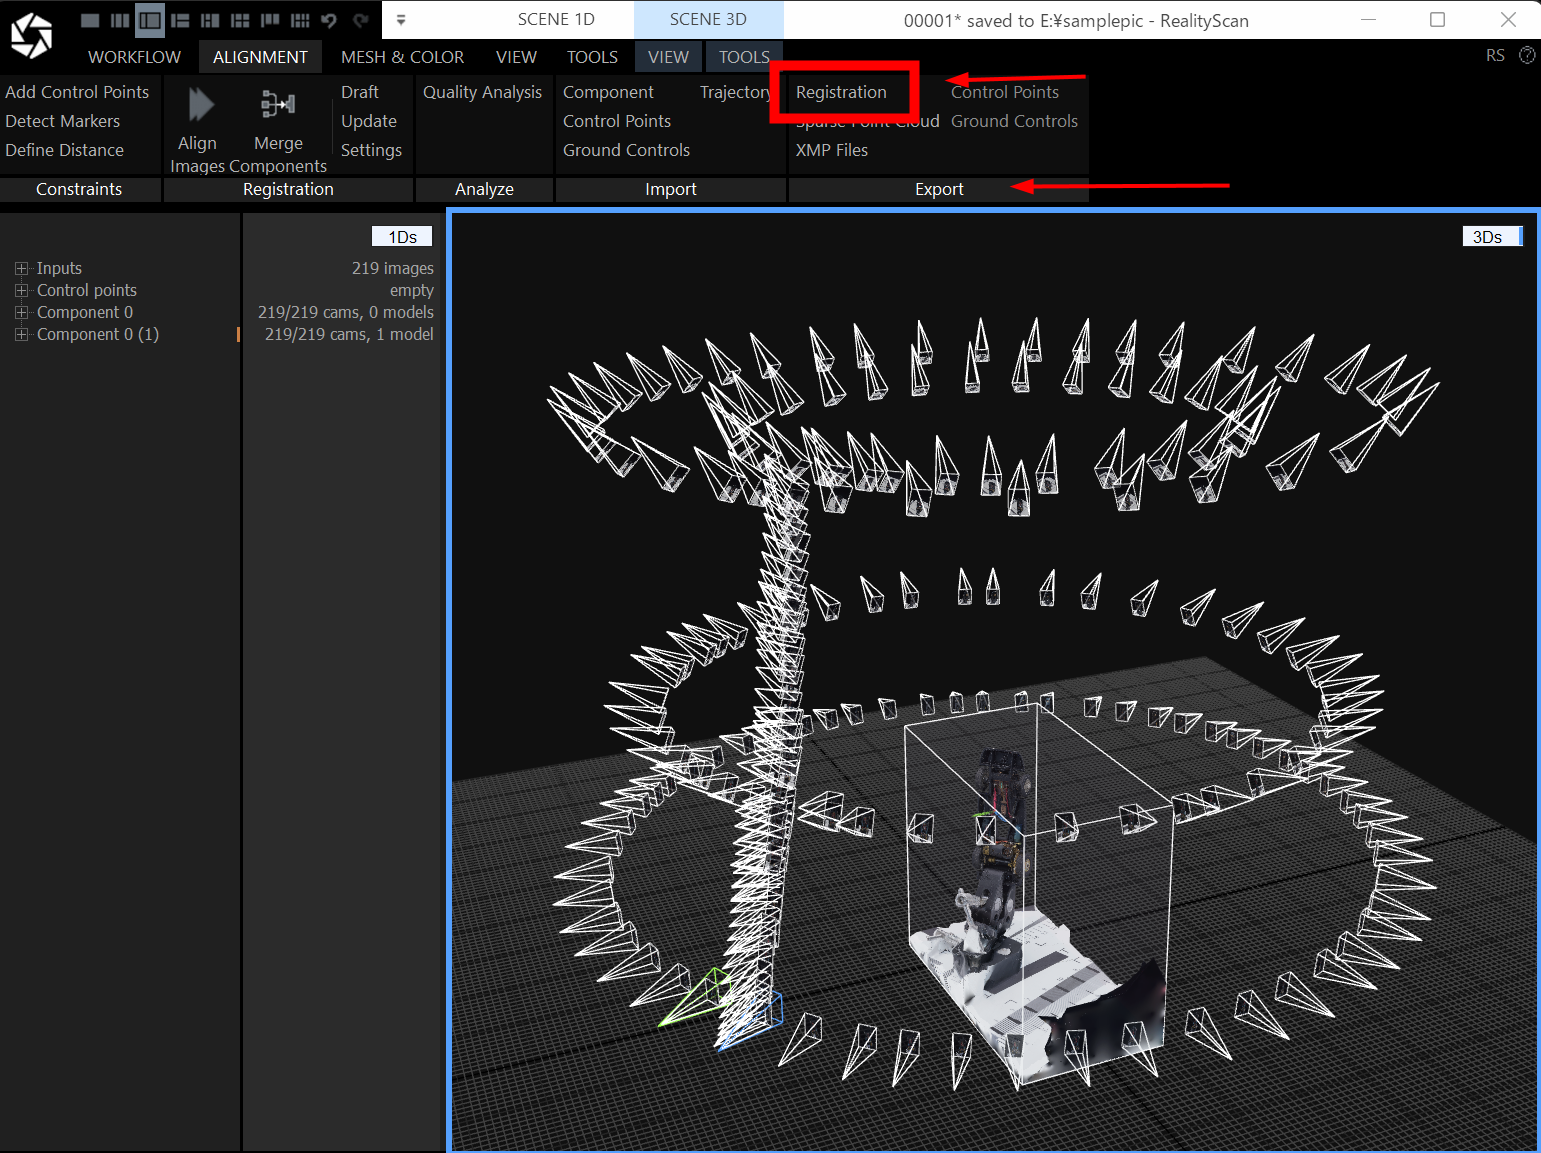
Choose a destination folder and configure the export settings. I used the following values.
| Item | Setting used |
|---|---|
| Format | COLMAP |
| Export images | Yes |
| Undistort images | Yes |
| Directory structure | COLMAP standard |
| Image format | JPEG |
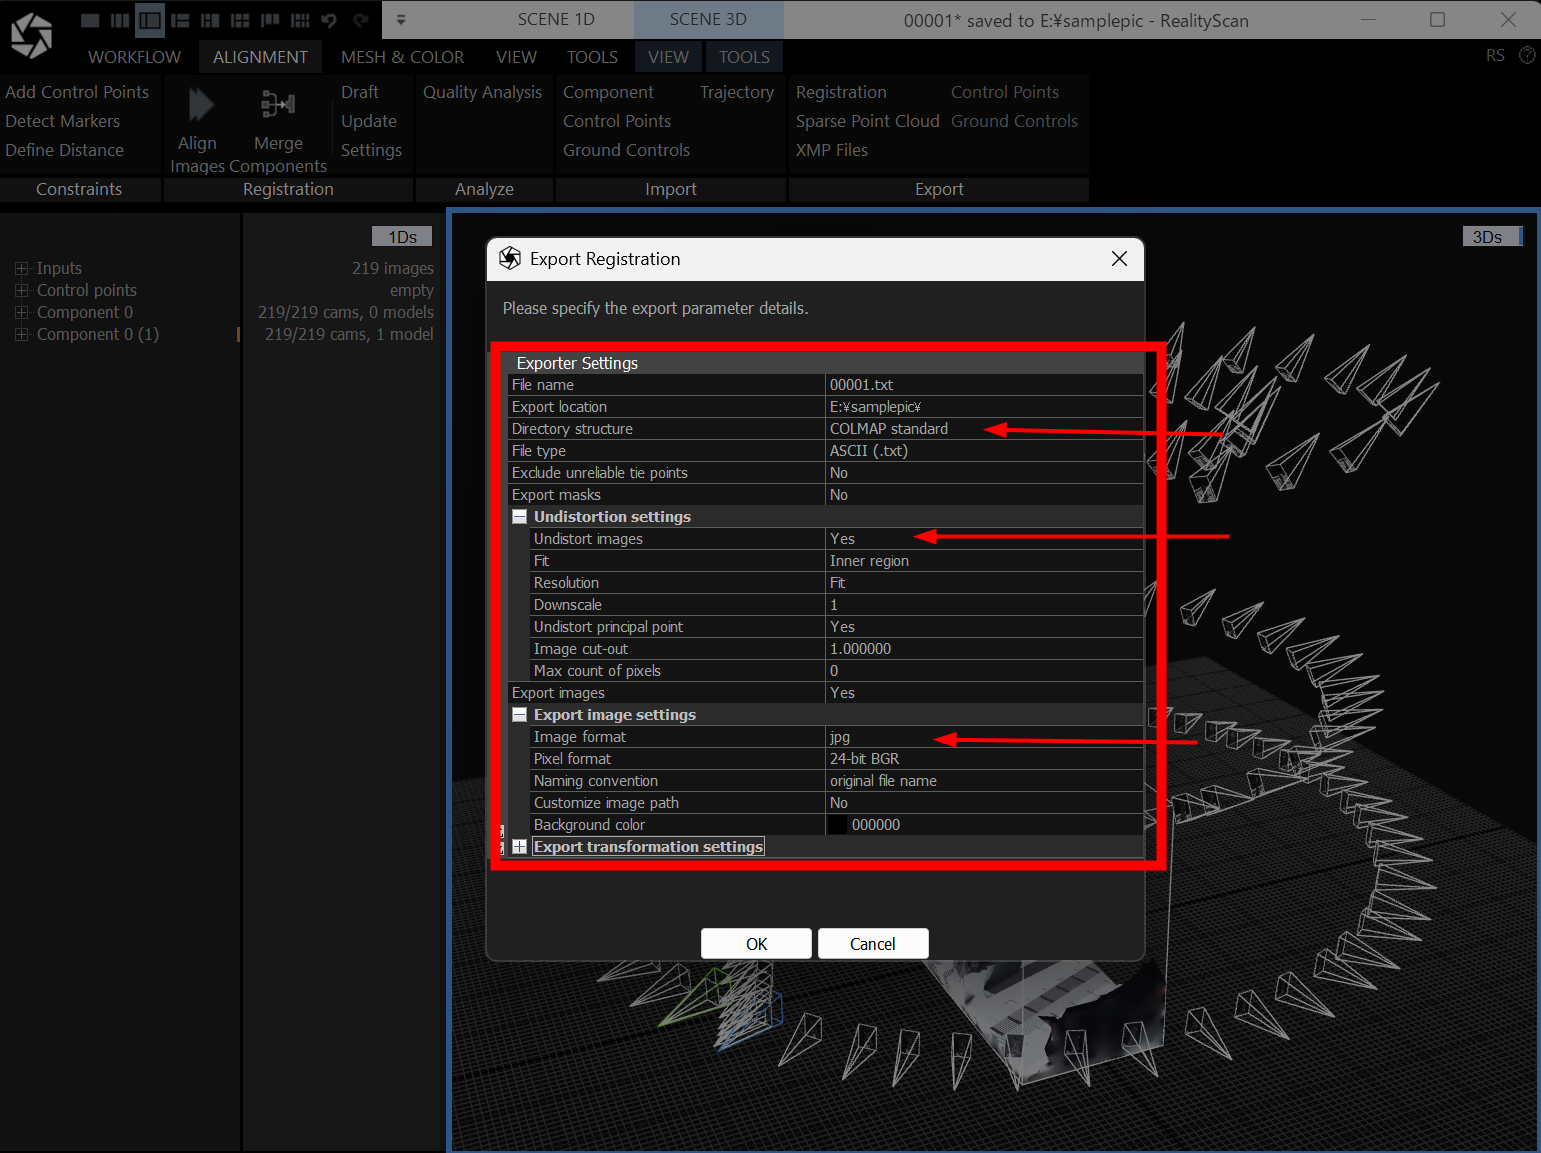
Undistort images exports photos with lens distortion corrected. So the workflow uses corrected images rather than the originals as they are. I found that unexpected. The photos are exported along with the camera information.
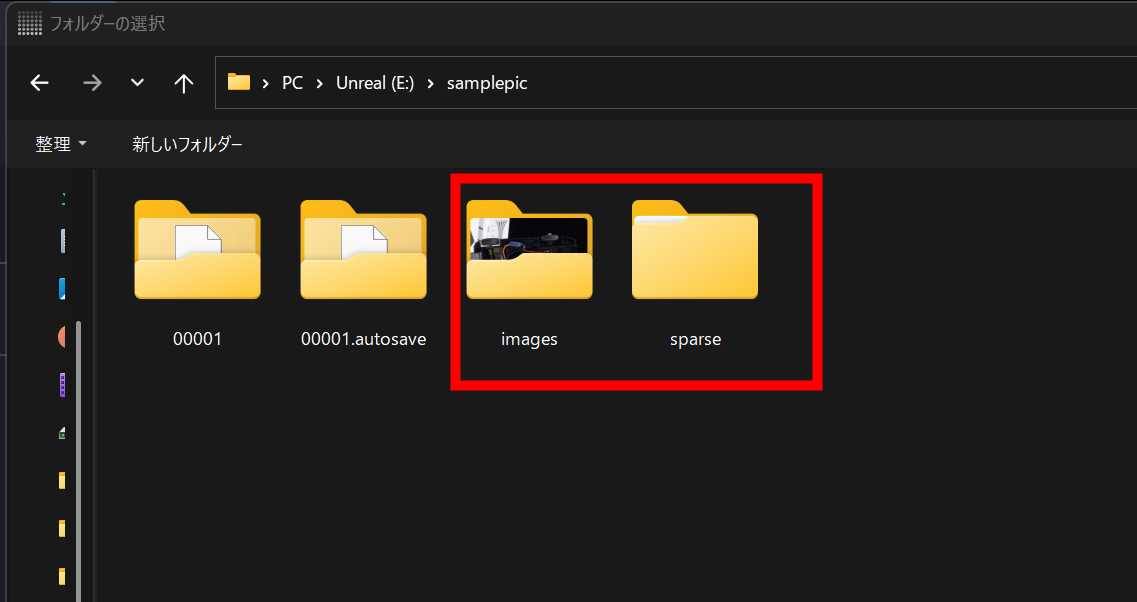
3. Import the data into LichtFeld Studio
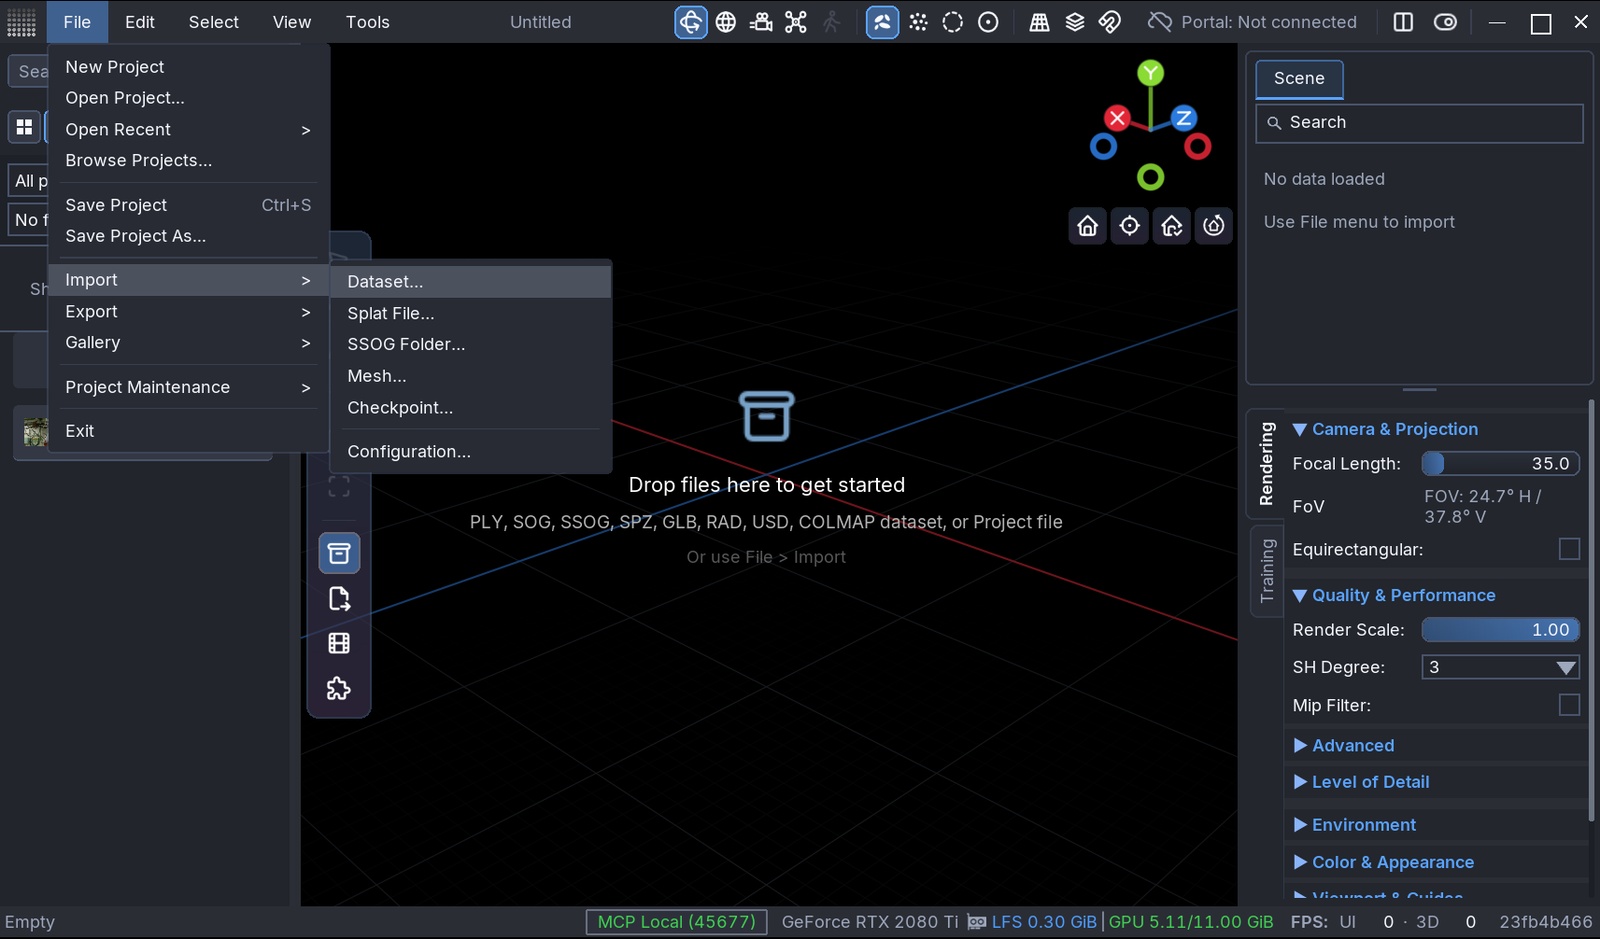
Once the export is complete, launch LichtFeld Studio. Under File > Import > Dataset..., select the parent folder where the data was exported.
Choose the folder containing both images and sparse.
Import the data. Clicking Create completes the preparation for generation.
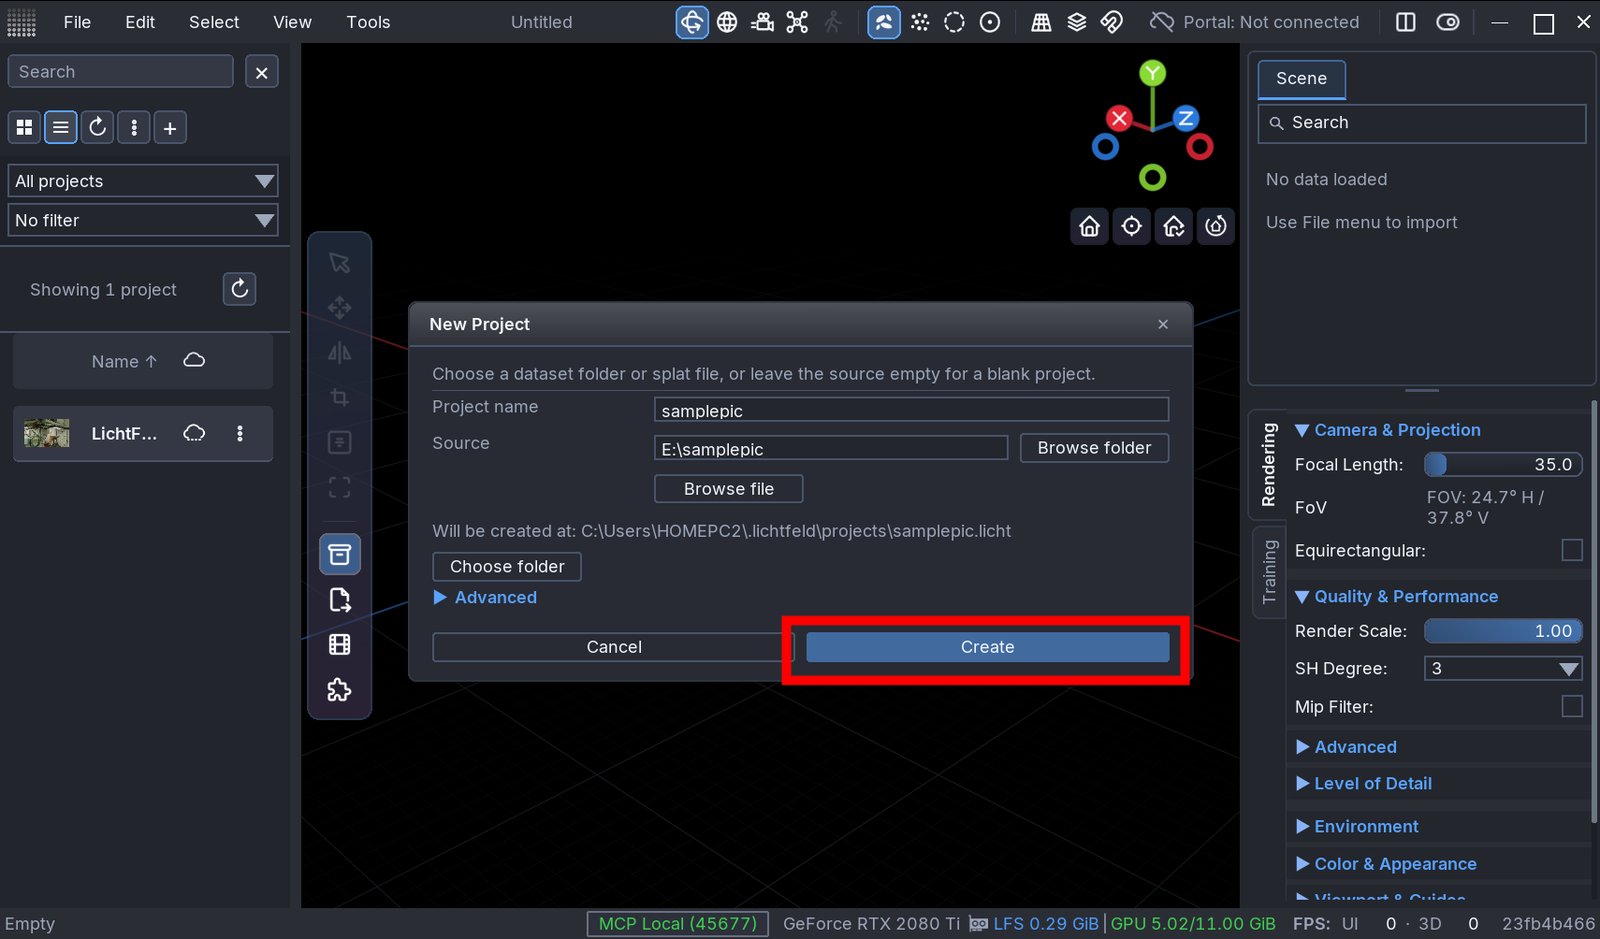
4. Start training with the default settings
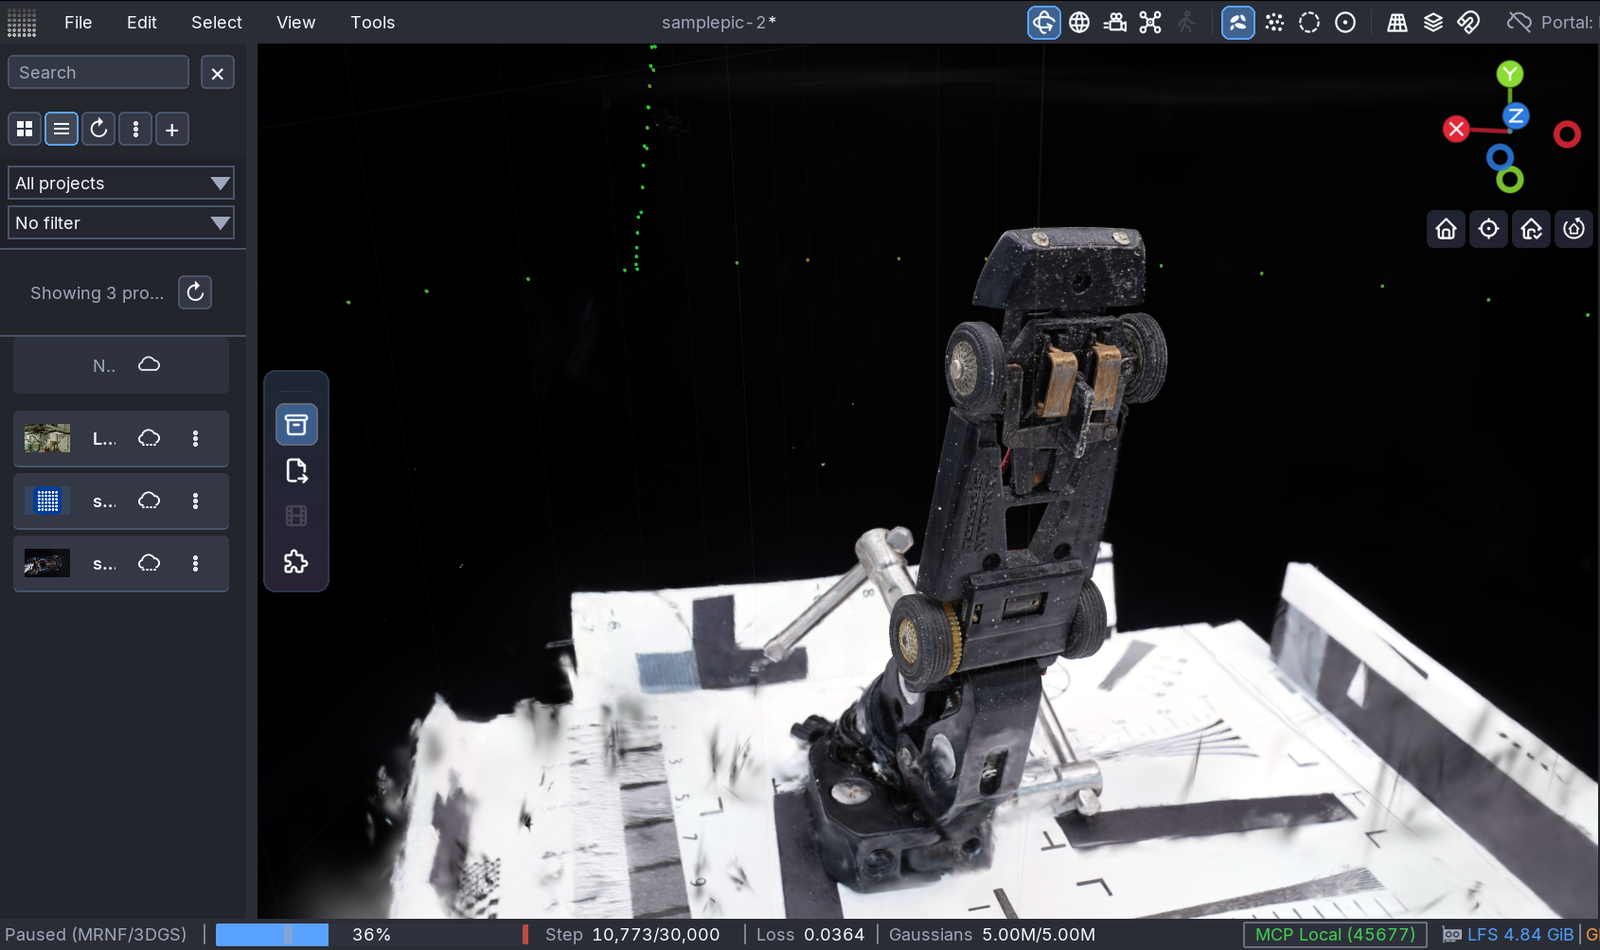
First, start training with the defaults. Simply click Start Training without adjusting anything. Then wait.
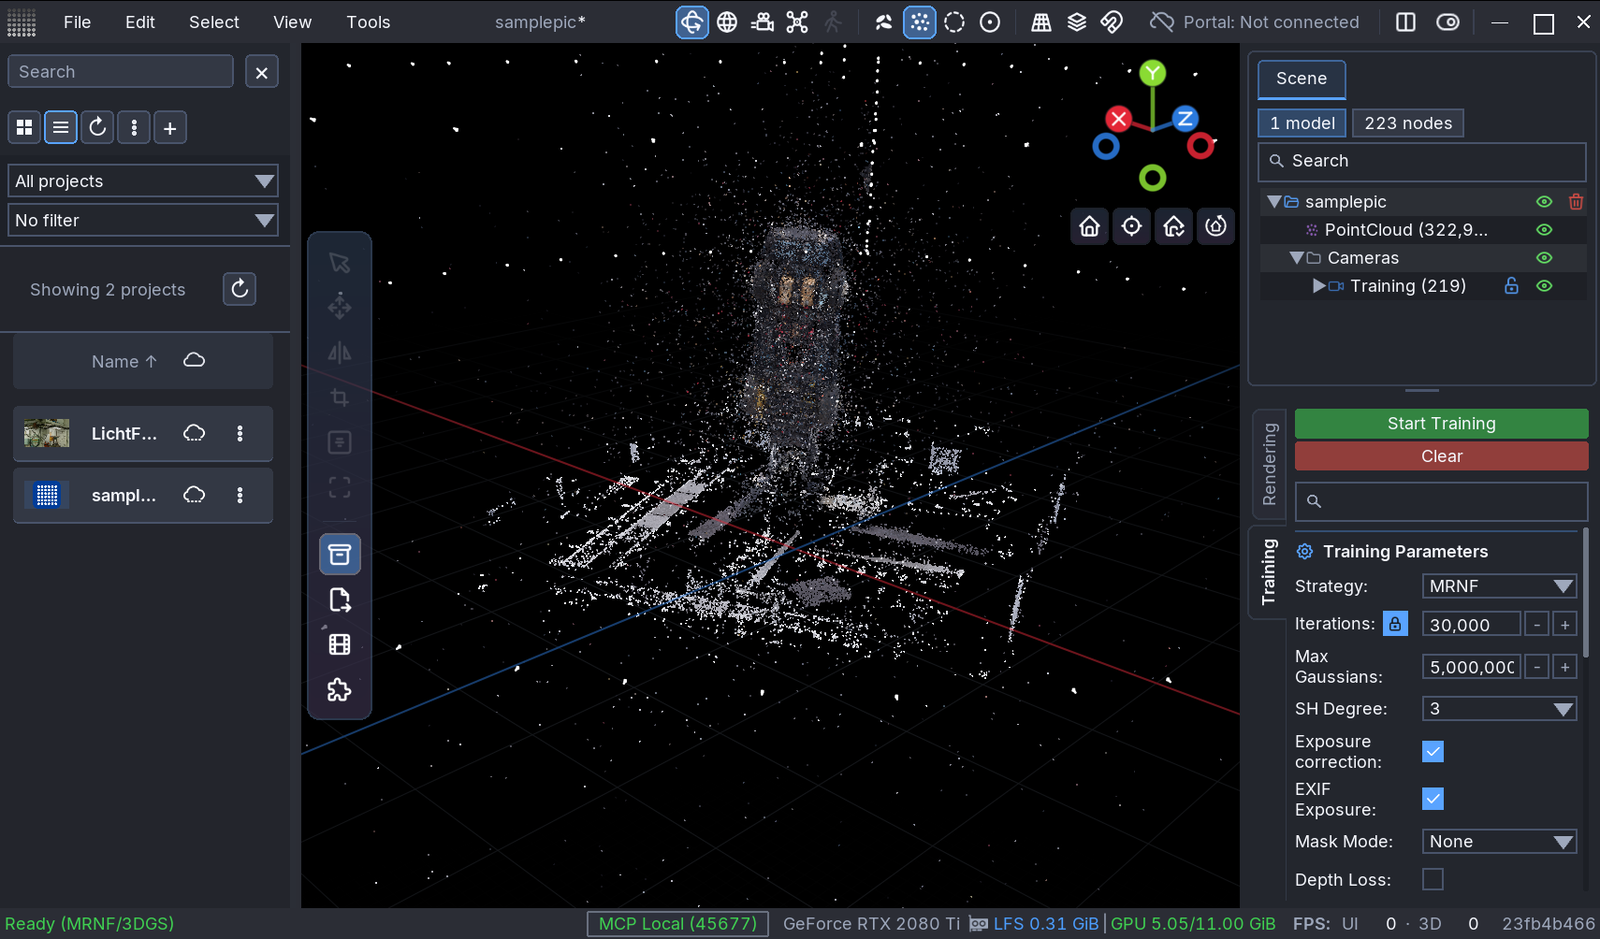
5. Check the result during training
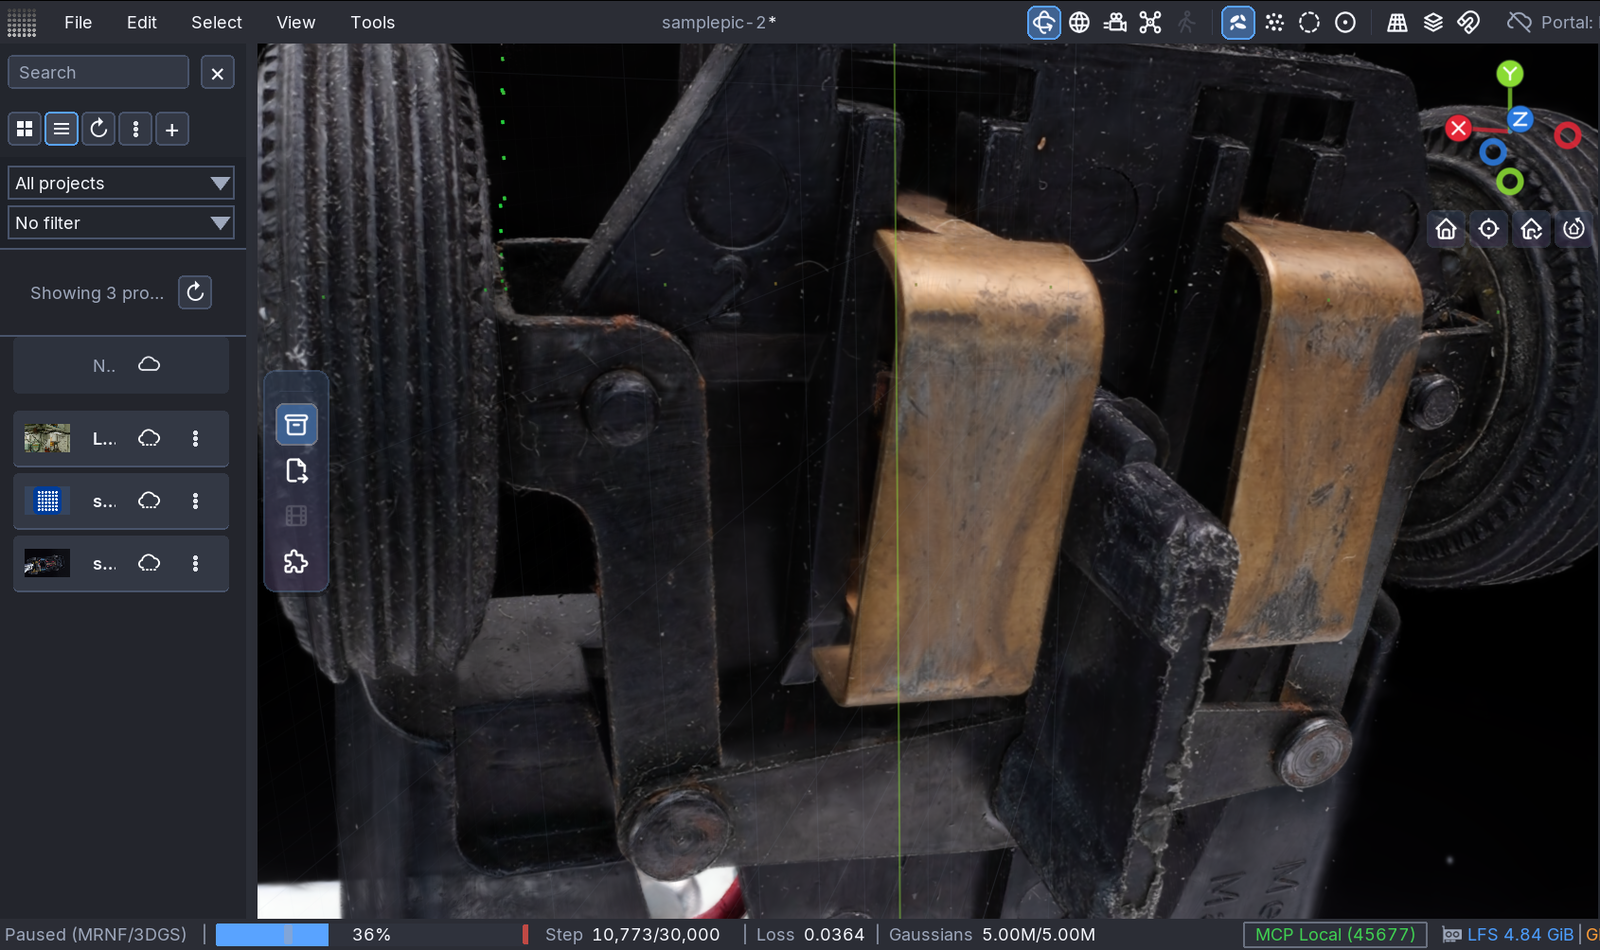
I let it process for about an hour, reaching roughly 10000/30000 iterations. That seemed far enough along. Let's look at the quality.
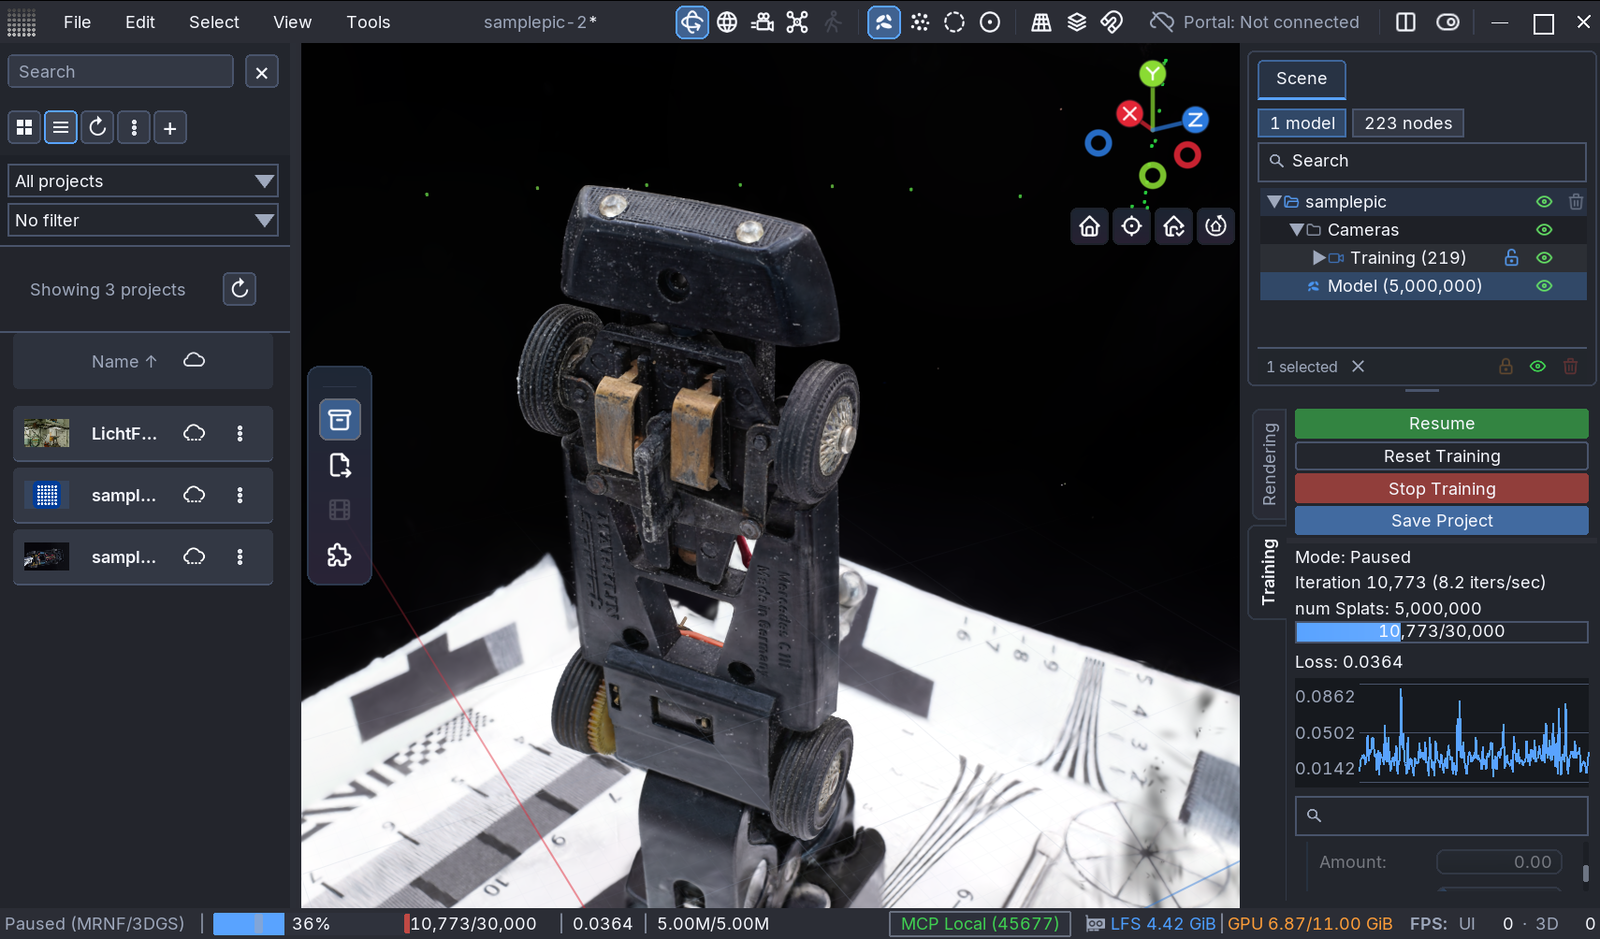
I have not compared it directly with Postshot, but the quality looks similar to me.
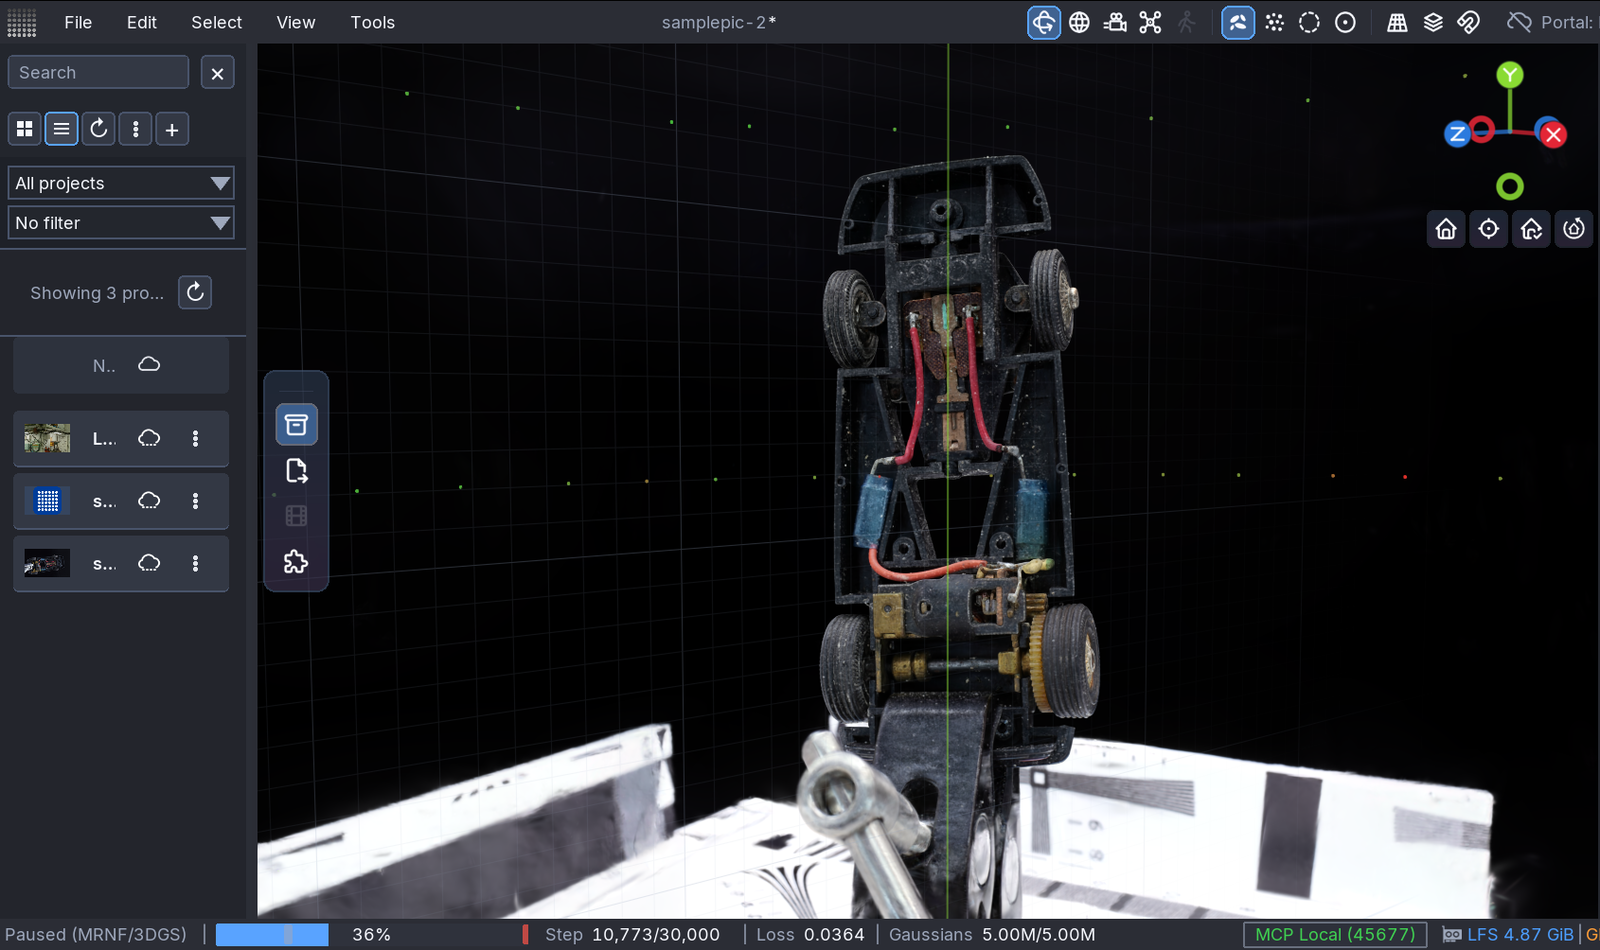
Even zoomed in, the fine details hold up.
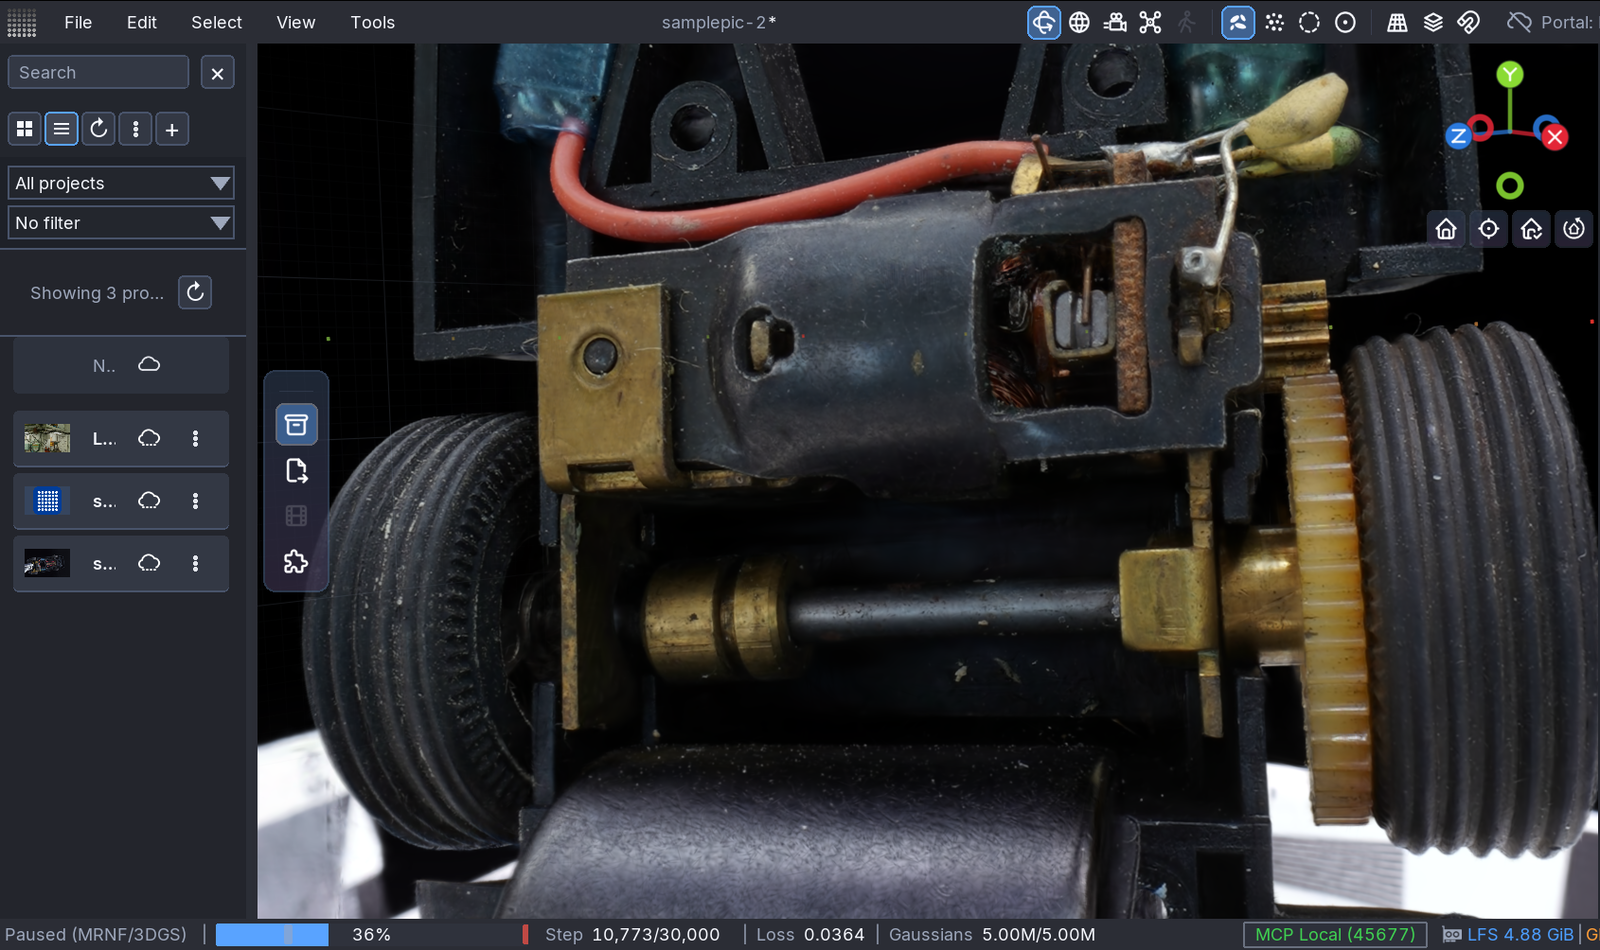
Let's look at the other side too.
It resolves the detail well.
I used the default MRNF strategy. MCMC and IGS+ are also available. The planned iteration count appears to adjust automatically to the photos. That is convenient.
6. Export the Gaussian data
Use Export to write out the result. There are quite a few supported formats. PLY is the usual choice, perhaps?
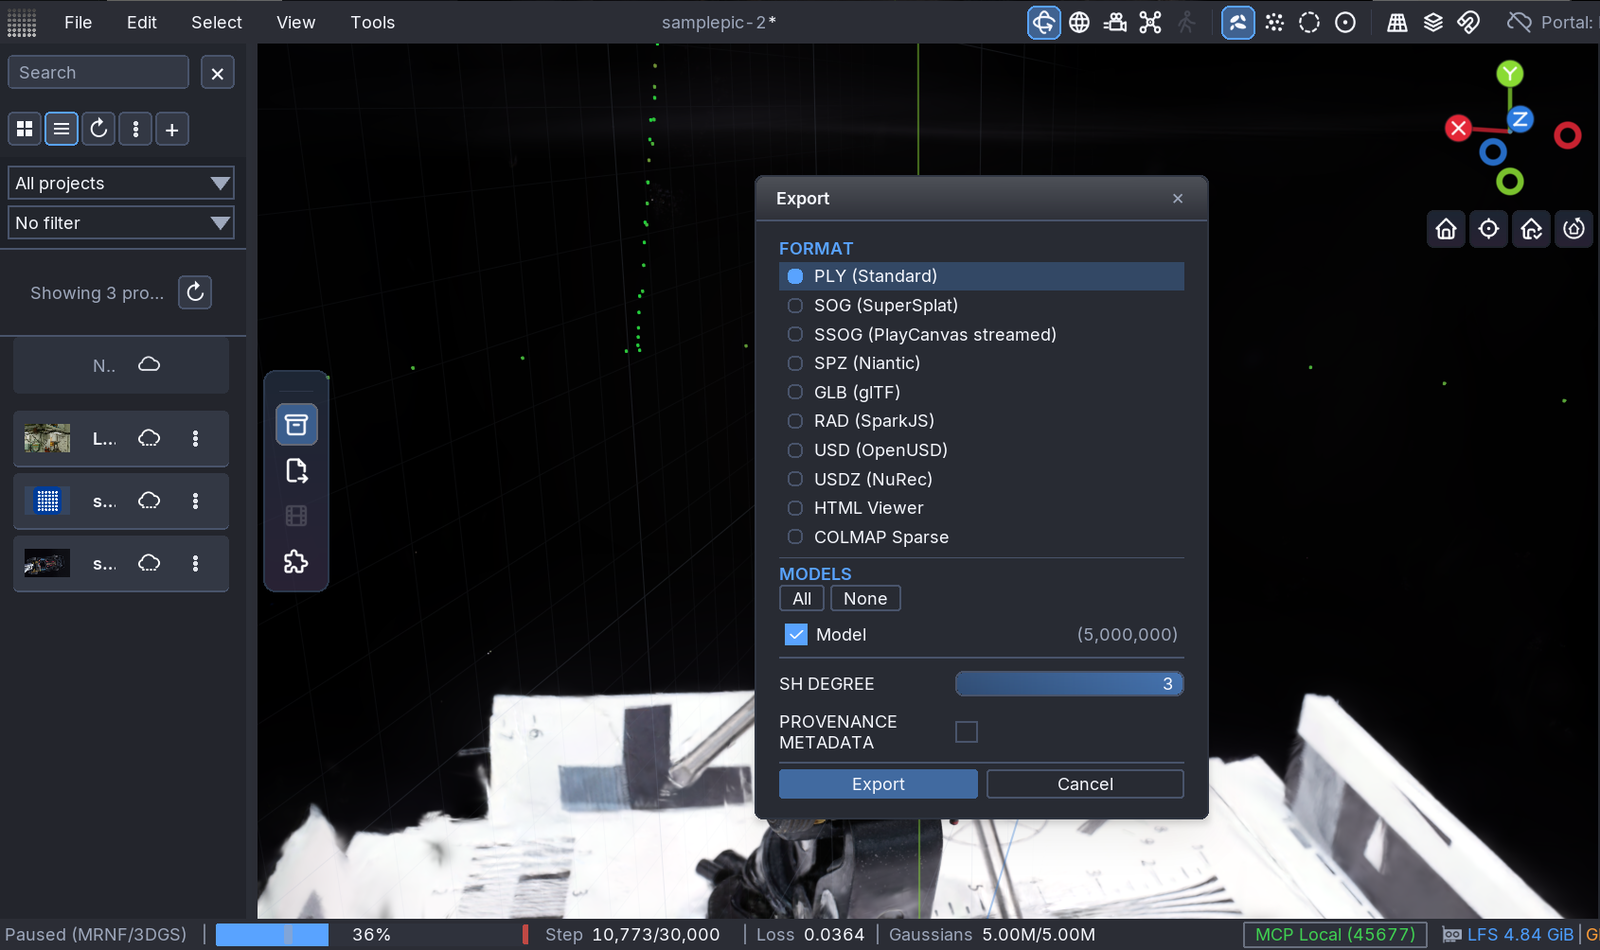
Plugins for 360-degree video and Blender integration
Finally, take a look at the official plugin catalog. It includes extensions such as these.
- 360° Camera Plugin: extracts frames from 360-degree video, applies masking and other processing, and creates COLMAP datasets for training.
- COLMAP Reconstruction Plugin: runs the process of estimating camera positions and a point cloud from photos inside LichtFeld Studio.
- GauSpla Blender Sync: works with GauSpla in Blender to connect a workflow where the same PLY file is updated and the result is reflected in Blender.
I have not tried the plugins yet, but extending the workflow from training preparation through integration with other creative software is appealing. Free Gaussian generation alone is welcome, and this level of extensibility is impressive.
Related articles
Updates and contact: X @riragoncom.